Salesforce Data Transfer Tools
It happens at every company: eventually, someone is going to leave for a new job. There’s usually cake, a card, and some sort of sendoff, and the employee is now a former employee. Or maybe an acquisition or business growth has led to the need for new sales territories or more sales reps who need someone to sell to.
Both scenarios leave you with a bunch of records either needing to be reassigned or, depending on your level of security throughout your organization, floating in a space that none of the sales or service employees can access. Despite whose responsibility these records currently are or were, they still need attention. So how do you go about reassigning records to new employees?
You could do it manually, but the amount of time going from record to record and changing the owner is incredibly time-consuming and a drain on company resources. The most efficient way is to complete a mass Salesforce data transfer using Data Import Wizard or Data Loader. Both data management options can help you achieve record transfer, but there are important things to note when choosing which one is right for your job.
Data Import Wizard
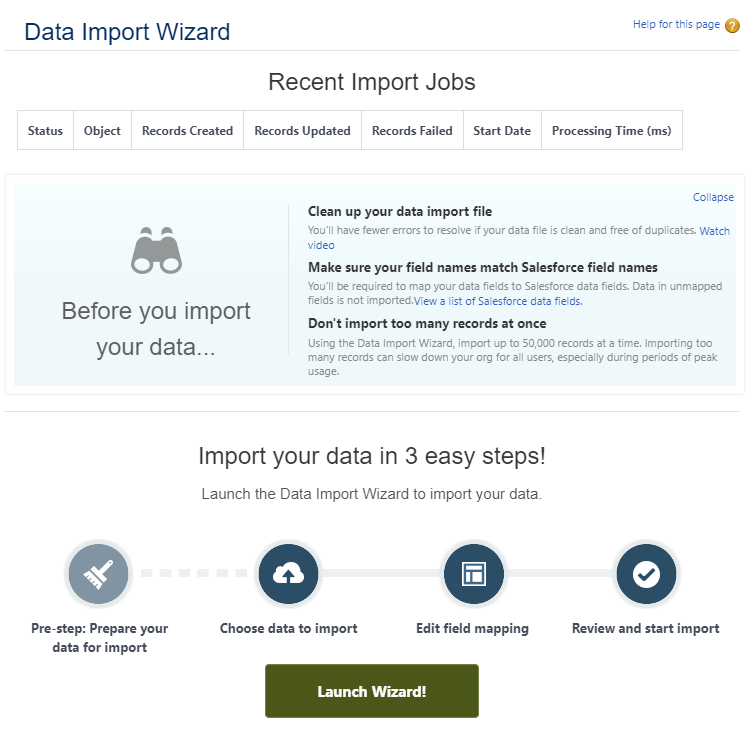
Data Import Wizard is native inside your Salesforce instance. It works with all custom objects, but the only compatible standard objects are Accounts, Contacts, Leads, Solutions, and Campaign Members. Import Wizard is also limited in the number of records it can process at one time, capping out at 50,000 records. It can match records in Salesforce using Salesforce ID, External ID, or Name.

Data Loader
Data Loader provides more coverage and the ability to import more records at once. Every object in your Salesforce organization is compatible with Data Loader. It can process up to 5 million records in one upload. Unlike the Import Wizard, it can delete and export records on top of the available import, update, and upsert options. Data Loader is a separate program that will need to be downloaded to your computer, and your Salesforce credentials are needed to connect your organization to Data Loader.
Salesforce Data Transfer First Steps
Now that you know the differences between your two choices, the records that will be transferred need to be grabbed out of Salesforce. To do so, create a new report of the object whose records you are wanting to transfer. The only necessary fields for a successful transfer are the record ID field. Although Data Import Wizard can match by name, using a record ID field will ensure the right records are being updated.
For Data Loader, an ID field is required for matching records for any function besides import. For ease of identifying each record once exported and to make editing the report easy, adding the name and owner field from the object is highly recommended. Next, filter the report by the owner by entering the name or names of the users whose records you want to transfer, then export the report as a .csv file for easy updating through either data management system.
Post-Export Steps
Once you have the report exported, it’s time to swap in the record ID of who will be receiving the records. There are a few places in Salesforce to find the record ID for the user taking ownership of the records.
The record ID is found in the URL of the User’s record page or the User’s profile page in Setup. If you need multiple user IDs for your update, the easiest way to retrieve all of them is to run a report of all users in the organization and add in the User Id field to the report. Bring all of the new IDs into the report to their corresponding records and save the spreadsheet. You are now ready for import.
The process to bring in records for Data Import Wizard and Data Loader is very similar, with only a few differences. You will have to log in to your Salesforce instance through Data Loader before use, whereas searching for ‘Data Import Wizard’ in Setup will take you to the tool with ease. Whereas Data Loader will open with a popup window of options to select the type of job before going to a new screen to select the object, Data Import Wizard will ask you to select the object first then if you wish to update existing records, import new records, or both.
Each application will then ask you for the CSV you wish to use for your update. Next is field mapping. Import Wizard will ask you to select field by field where to map whereas Data Loader gives the option to auto-match or drag-and-drop to a table. Before executing the job, Data Loader will ask where you would like the error and success files to go on your computer. Import Wizard will give you one final chance to double-check your request before running. Now you’re ready to roll.
Data Loader has a progress bar for you to follow, while Import Wizard will send you to the job detail page for your batch upload. Both alert you once the job is complete and your records have been transferred. Should there be any errors, each system will give you a rundown of them for review.
Thanks to these two easy-to-use tools, a Salesforce data transfer that seems quite daunting becomes simple in practice and efficient in execution. Your organization doesn’t miss a beat with the right people in ownership of the records they need to keep business running smoothly.
If you need more assistance with Salesforce data transfers or any other help with your Salesforce org contact us.


